Packing for Air Transport
Having scoured the Internet I found it very difficult to find a good guide on how to prepare a glider for transport on an aircraft. Many people have done it, commented or advised on forums and shared their horror experiences, but it was impossible to find a good, complete illustrated guide for this. In February 2018, I travelled to Lanzarote from England's Gatwick Airport, taking my relatively new Wills Wing U2 160 with me, in doing so; I packed my glider using many of the tips and experiences of others as a reference. Fortunately, my glider survived the trip there and back so I wrote this guide as a reference for others.
Disclaimer: This guide is written in good faith and based on my personal experience of successfully transporting my Wills Wing U2 to Lanzarote and back successfully. I cannot guarantee that a glider packed using techniques in this guide will not sustain damage, even when packed well, as this is an unfortunate risk any pilot transporting their glider must take.
Preparation - Shopping List
Before you begin to short-pack there's a few items you are likely to require and I've compiled a list of recommendations below. Where possible, I've provided links to some of the purchases I made, but you do not necessarily have to use these items (and I suspect they will not always be available). If you have any better suggestions, please do so using the comments section at the end of this article.
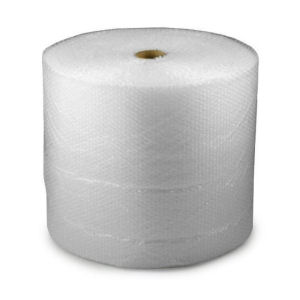
100m length; 50cm width
Approximate Cost: £12.00
Link: Amazon : 500mm x 100m Roll Of Quality Bubble Wrap
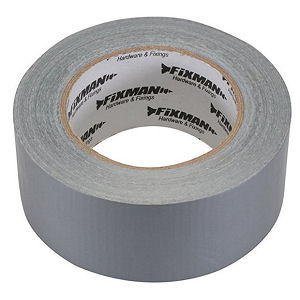
50m length; 5cm width (two rolls, one packed for return journey)
Approximate Cost: £7.00 each
Duct tape is available from many sources; I went for the more expense known brands as I prefer the stickiness of them.
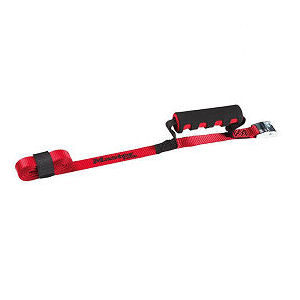
Carry strap (also doubles up as a tie down strap for securing the glider to the car). This will be attached to each end of the short-packed glider to encourage the airport baggage handlers to carry your glider correctly and avoid temptation to drag it across the ground!
Approximate Cost: £7.00 per strap; two will be required.
Link: Amazon : Masterlock 2.5 m Single Carry Strap
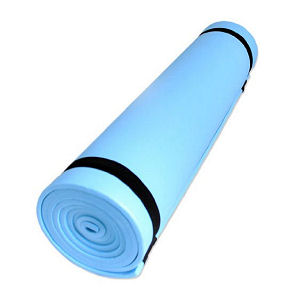
Various sources; would recommend >7mm thickness of a moderate foam density. 4-6 rolls may be required. This is used to add protection to parts of the air-frame and to create a padded outer shell around the entire glider before insertion into the glider bag.
Approximate Cost: £7-12 each
Link: Amazon : Milestone Camping Mat 180cm Linked camping mats were not very durable, I would go for a thicker mat in future purchases. Alternates: Cardboard, exercise mats or play mats, cut to size to permit them to be rolled around the glider will also work; or indeed a combination of all the above. Approximate Cost: £7-12 each
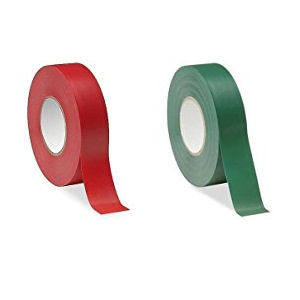
Available from most hardware stores. I use this to mark parts of the glider from the left (Red) and right (Green) side of the glider, e.g. leading edges, sprogs, side wires, uprights etc.
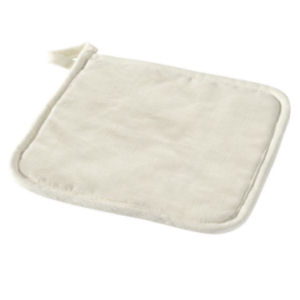
I picked up a pair of these from my local kitchen shop to protect the ends of the glider bag from drag damage. Any piece of fabric or carpet off-cuts should also do the job. They also make a very good knee protector while packing the glider!
Approximate Cost: £2 each

4 plastic bottles are optionally required to protect the exposed ends of leading edge tubes. The plastic bottles need to be of sufficient diameter that when they are cut in half, they can slide over and protect the end of the leading-edge tubes - Tropicana bottles are a good fit. In this guide, I had some specific pads made for a glider that I used to regularly short-pack.
Preparing the Ground
I start by laying out a large sheet of tarp across the ground to protect the glider while working on it. Of course, you may not necessarily have this at your destination and I wouldn't recommend packing this, but it will reduce the risk of damage to your glider, particularly on abrasive ground as pictured above.
Most gliders can be short-packed by removing the outer leading edges. The technique for each glider varies so please consult with the manufacturer's recommendations/guide.
I also recommend completing work on one wing before moving to the next. If your glider is laid out upside down (the norm), remember that as you look at the glider, the left wing will be on the right and the right on the left... alright??! This is another reason why I use coloured insulation tape to mark things as I go!
Outer Leading Edge Removal
On the Wills Wing U2, it's necessary to remove the sail from the outer leading edge before the leading edge can be removed. Other gliders may have a webbing strap or ball joint over the end of the outer leading edge. All require the sail tension to be reduced before they can be removed and I have found this to be much easier if the wings are spread slightly and the sail is gently shaken. On my glider (the Wills Wing U2), the sail is detached from the outer leading edge by removing the security ring and detaching the sail (as pictured above). Once the sail is detached, quickly re-attach the security ring to prevent loss.
Once the outer leading edges are removed, protect the ends - in this picture I had some specific padding made up for a glider that I had to regularly short-pack (the big green pads). These slide over the exposed ends of the leading-edge tubes which can be quite sharp. It's important to protect the ends well to avoid damage to the glider's sail. Other people have used the ends of plastic bottles (foam or bubble wrap alone is not durable enough and will easily be cut by the sharp ends of the leading edges). I have also used appropriately coloured insulation tape to mark the left and right leading edges respectively. On this specific glider, I have taped and padded the sprogs alongside the leading edge to preserve the sprog settings.
Protecting the Sail
Important It's exceptionally important to protect the ends of the inner leading edges as the sail will be folded back over them when short-packed. Here I've done this again using the same foam-pads that I used for the outer leading edges, although a plastic bottle cut in two and placed over the leading edge and padded with foam or bubble wrap will also suffice.
(Glider Specific) Inner Sprog Removal
On the Wills Wing U2 it is necessary for the inner sprog to be removed as it will not fold inward without interfering with other parts of airframe. Once the sprog was detached (noting that the cable still connects the sprog and the inner leading edge), the sprog setting was preserved by wrapping insulation tape around the sprog adjustment bolt and then the whole sprog padded with bubble wrap. The sprog is then laid inside the sail alongside the inner leading edge.
The Wills Wing U2 also has a transverse batten in the sail that the sprog rests against when rigged. This must be removed as it will inhibit the folding of the sail; I found this to be the fiddliest part of the whole exercise, but once removed, I stashed it with the battens.
Fold the Sail for Short-Pack
Double check that the end of the inner leading edge is well padded and when satisfied, completely fold the sail back over itself towards the nose of the glider. Others recommend the insertion of a round plastic bottle in 'bend/fold' to ensure the sail neatly folds around without creasing (not pictured here).
Short-Packing
Once leading edges have been removed and the sail folded back, it's time to start padding and packing. First, take each removed outer-leading edge in turn and wrap in bubble wrap by rolling bubble wrap around it. Use insulation tape or duct tape to secure the bubble wrap to the leading edges. One or two layers of bubble wrap should suffice.
Once the leading edges are wrapped, stow them between the ends of the sail near where the keel sits. I also stow the base-bar here too. It's a good idea to identify any areas where contact with the airframe may cause damage if knocked; especially now the outer leading edges and base-bar are stowed here. Use strips of camping mat to provide some additional padding where necessary.
Important Ensure everything you need to pack is now stowed in the glider - if you're packing spare uprights, ensure they are bubble wrapped and stowed, your battens are packed (alongside king-post?), and curved tips etc. are all stowed and secured; you really don't want to be unpacking everything because you've missed something at this stage!!
Do a final check of the entire glider, adding bubble wrap/camping mat where possible knocks or vibration may cause damage. I added some additional padding around the top of the A-frame, around the cross-bar junction and on the knuckle joints of the A-frame.
Using the straps/ties that come with your glider, secure the glider and sail tightly together. Tight as not to damage the glider, but tight enough to squeeze the entire package together to allow it to squeeze into the glider bag; remembering that one end of the glider is now much fatter than it has been before (keel end).
Wrapping
Using the foam mats, cut them to length to allow the glider to be wrapped. Any off-cuts, just jam them in between the uprights etc for additional padding.
Padding the Ends
Using some thick foam, pad both ends of the glider and secure in place using duct tape.
Bubble Wrap
Supporting the glider on a chair and working from one end to the other, begin to bubble-wrap the glider from end to end as tightly as you can without tearing the wrap. You may find it useful to use duct tape as you go, but remember, you'll probably need to salvage as much of the bubble-wrap as you can for the return journey.
Squeezing into Your Glider Bag
Tip On some gliders you may need to turn the glider bag the opposite way around as the glider is likely to be fatter at the keel end than the nose end. Some glider bags are normally wider at the nose end so experiment to find what gives the best fit; typically, you'll now need the widest end or part of the bag at the fattest end of your short-packed glider.
You will also have a significant length of bag hanging loosely at one end - this isn't a problem, but you will need to zip up your glider bag towards this end. The lose end of the glider bag should then be folded back into the bag and zipped all the way up. Ideally, you should be able to get the zip all the way down to the end. You may need a second pair of hands to pull the glider bag tight before zipping.
Protecting the Ends
This next piece of packing advice is really to protect the glider and its bag from being dragged across an abrasive ground by a baggage handler. I've heard reports of bags and glider sails being damaged in this manner. This stage is completely optional of course. Using a carpet off-cut or in the example pictured, a pan mat. Duct tape this to secure what would likely be the bottom of the glider bag. It's a good idea to wrap duct tape completely around the glider as the tape didn't want to stick to the glider bag.
Final Padding and Adding Handles
Finally, bubble-wrap tightly both ends of the glider and use generous amounts of duct tape to secure in place.
Important It's also very important to 'disable' the normal glider bag handles as these will now be in a position beyond the centre of gravity of the glider bag. Any attempt to pick up the glider using these handles will result in one end of the glider resting on the ground which risks it being dragged to its destination. I covered these handles using more generous amounts of bubble wrap and duct tape that also provided a little bit more padding - others just tape these handles down without need for bubble wrap, both techniques work!
The Finished Item
Tip It's important to encourage the baggage handlers to carry the glider correctly. To do this, attach carry straps/handles at each end of the glider (see picture below). You can of course make your own handles (as I had to on my return trip), but I quite liked these straps as they doubled as a glider strap for transporting the gliders on the roof racks at our destination.
And that's the finished item, measuring in at 4.08m (13.4ft) in length and weighing a surprising 27kg on the outbound flight and 37kg on the inbound flight (suspect it wasn't measured accurately on the outbound flight). For reference, Wills Wing publish that the U2 160 weighs 30.8kg on their website and has a short pack length of 3.9m. EasyJet state a maximum of 32kg for any one item, but despite this, I was able to fly out and back with EasyJet with no difficulties or additional charges.
In the picture above, I did lose the left carry strap on the outbound flight, so would recommend securing that strap a little more inboard of the glider than shown above. It's worth noting that the baggage handlers struggled to load the plane on our outbound journey, delaying our departure for 90 minutes, so suspect this may have been when I lost that strap. I'm very pleased to report, despite problems loading the plane on our outbound journey, the glider was successfully flown out and returned without damage.
One Final Tip; passed on to me by a baggage handler (Dave T.); place a label on your glider stating “Fragile/Heavy – Glider – Please handle with care”, and most importantly, add the words “Thank you!”. If the loaders know this, they will treat it that way!
So that leaves me to say good luck, have a great time flying at your chosen destination and please share your experiences in the comments at the end of this article. I will also add some pictures of alternative glider packing techniques!
Update History:

